I was feeling pretty confident this morning, and decided that it would be a great idea if I did another dry fit of my HBS Creatin Contest build to see where things were at, as I've spent the past couple of weeks doing a lot of painting and not much else.
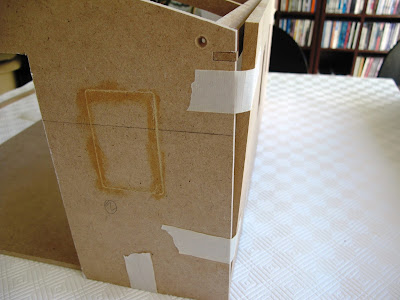
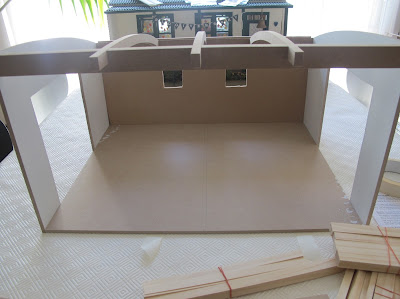
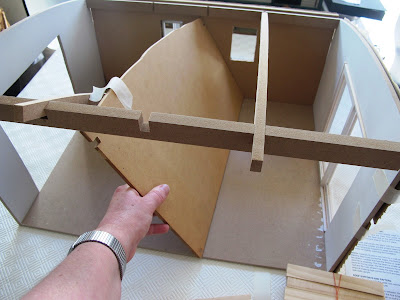
This time round, I fitted some of the roof pieces in place and realised not fitting them in the first mock up was a major mistake.
Because there's a beam across the back that I didn't factor in to my measurements, so I'll need to cut down the back wall to fit.
It's like the build is taunting me.
I started at the bundles of wood pieces that I haven't placed yet, trying to figure out where they were supposed to go, and then decided I probably didn't need them anyway.
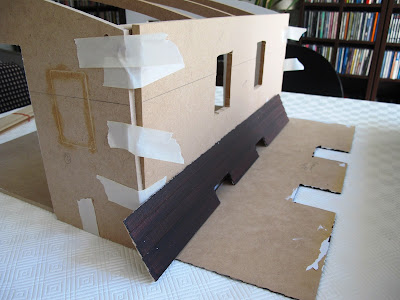
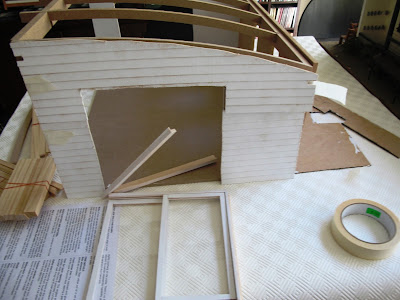
Feeling disheatened, I thought that taping the cladding on and doing a dry install of the windows would help cheer me up.
Except that the cladding kept falling off...
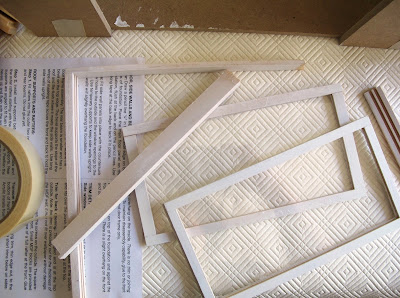
the french door frames fell apart as I was carrying them to the table...
and when I tried to install them...
(did I mention that the cladding kept falling off? Which was just as well as the doors didn't seem to want to fit into the holes I'd cut in the cladding.)
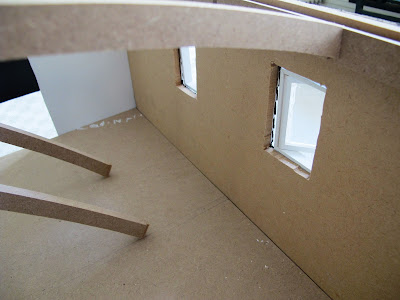
And when I fitted the back windows I discovered that the thickness of the weatherboard cladding and the wall made it so the windows were set in rather than flush.
Another headache to add to the list.
And, of course, the centre wall is now completely the wrong shape to fit.
The final straw was the fact that, although I'd been working almost daily on the build for weeks, it really doesn't look like I've achieved anything. And anything I have achieved looks like it'll have to be redone anyway.
So I decided to step away from the whole thing and go for a walk to the post office. During which time I thought deeply about just giving up on the whole build, having a rest from minis for a week or two, and then going back to the part of the hobby I enjoyed, chalking the whole build up as a learning experience.
And there, waiting for me at the post office, was an unexpected delivery:
#HBSCreatinContest2015








6 comments :
I would cut off the 'tabs' from the rear cross beam rather than cut the whole rear wall to make it fit. That way you can move the beam and arched rafters forward a little and glue them to the back wall. The back wall will support the side walls, since it sits inbetween them and the weatherboard will cover the 'tab' holes. For the windows, I would add some beading (strips of wood) to the inside to add to the thickness of the window frame so that it's flush to the wall. What glue are you using for the weatherboard? It has to be wood glue, not shitty superglue or anything that just puts a film on the surface of the wood.
You'll get there in your own, problem solving way. I'm rooting for you *looks for pom-poms*
X
Frustrating when you have days like this. That's why I ended up changing my whole idea for the build. Nothing was fitting right. Although my secret build is going much better.;-) I'm with Pepper for the windows, but It might be easier to cut a straight line across the back wall to make it fit. You'll figure it out. Sometimes you just need a little break to think it through. Glad the package got to you in tact!
I ran into this problem too. I agree with Pepper. Moving the back beam forward won't hurt anything structurally. Just make sure your roof beams are trimmed accordingly or they'll stick out from under the roof a little bit.
My windows didn't fit perfectly either but with a little bit of strip wood to build the frame up into the house they look great. My siding kept curling upwards... drove me crazy until I got the right kind of glue. Then you just have to wait to let it dry. Not my favorite thing.
I'm rooting for you. Give yourself a little break and refresher to breathe and I bet you'll be ready to get back to it.
First solution - stop dry fitting for now. Second, a cup of tea and cookies are needed next time you work on the build. I actually like that the windows fit the way they do. If you frame them out with some wood strips you will have a nice sill to place plants and bits on, or hang a plant inside the frame.
The worst part is always the walls and structural parts. Push through! You can do it! Then it's decorating fun.....think of all the mini scenes you can make in that place.
Pepper: You are brilliant! Thank you :-D (Now if only you lived closer: I need to get a couple more roof beams cut for the pergolas.)
Oh: and I plan to use Weldbond. Stop me now if that's a dumb idea...
Mad for Mod: Thank you for making my day, it was like a sign that I should stick to what I enjoy in future. Although I guess learning new things is handy.
Kitty and Kat: Bugger a cup of tea. A friend and I drank sparkling wine and I realised that even stepping back from it for a few hours helped gain perspective. I should have remembered that everyone looks at their own projects too closely when they're working on them and therefore all the mistakes look HUGE. And once the project is done no one really notices them. :-)
Weldbond *thumbs up*
=0)
Post a Comment